Home Lab Build - #5 Deploying the Platform
Installing the Kubernetes software platform on my home lab and some fixes along the way.

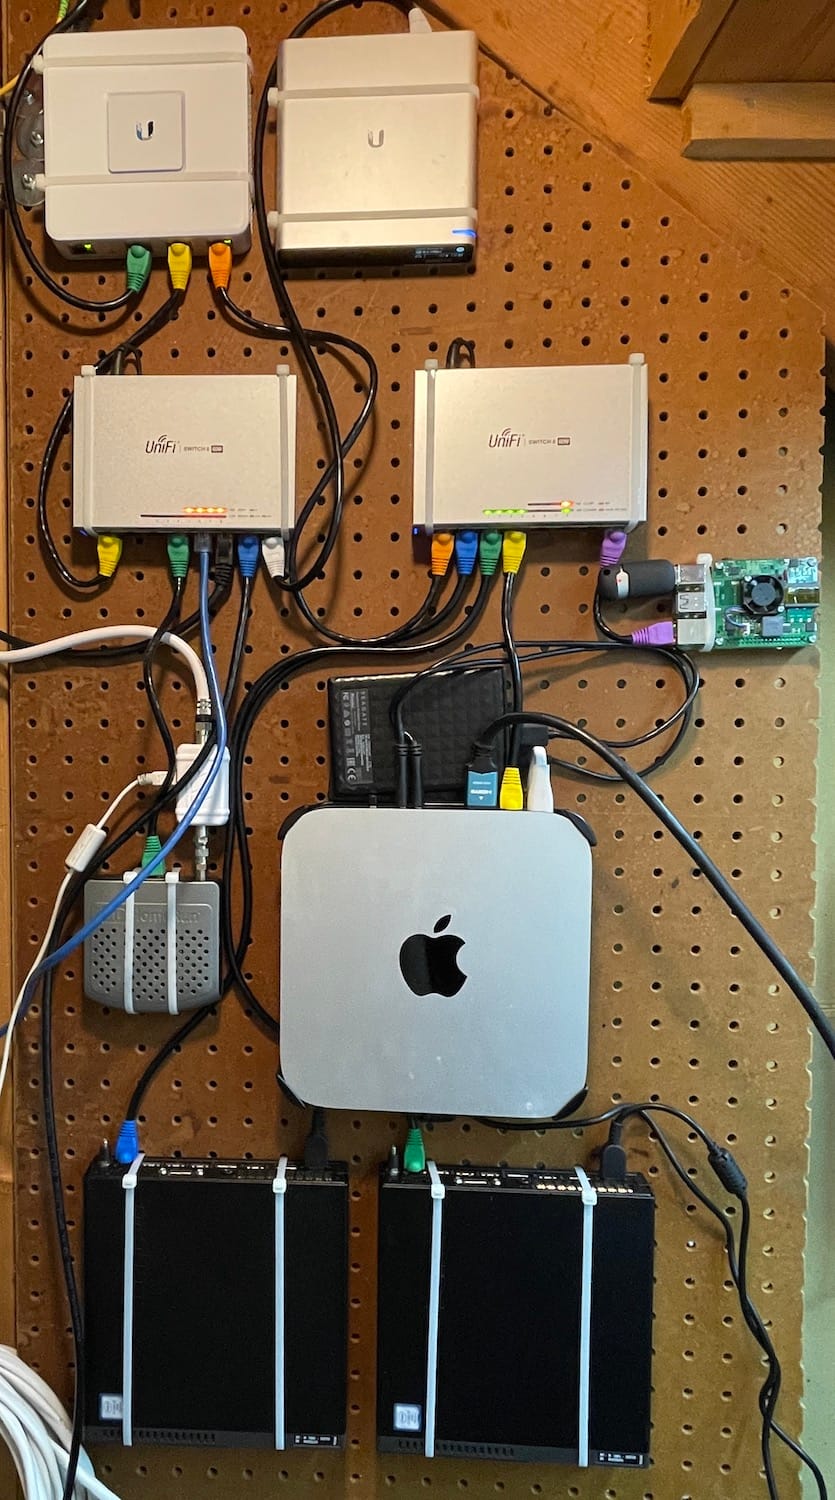
Getting computers to boot is nice, but they need software to run. For my lab, I knew I was going to put them together as a Kubernetes cluster. I want to minimize hand-tuning the actual machine and rely on Git-ops where I can. Hopefully, if I have to rebuild a node, it's less painful to do so. Hopefully, I'll never have to test that theory.
About a year ago, I tried a number of different Kubernetes platforms, looking for one that I could use to link the old Raspberry Pi and MacMini (my first iteration of a home lab). Unfortunately, most of the available platforms that would run on Mac didn't really make it easy to run multi-node clusters. Of all the ones I tried, I liked the experience of Microk8s the best, and I ran that as a single-node cluster on the Raspberry Pi.
For the new lab, I opted to keep using Microk8s, since it worked well for me in the past, and since it provides packages that adds the additional functionality I wanted.

Setting up the Lenovo M910q nodes
Since I'm using Microk8s, I'll be using Ubuntu 22.04 LTS (Jammy Jellyfish). the process of installing Ubuntu and getting Kubernetes running was simple:
- Download the ISO for the Ubuntu server installer
- Use Balena Etcher to flash a USB thumb drive with the ISO
- Boot the computer into that drive and start the installer
- During the installer, there were only a few things I did other than the defaults:
- Partition the two drives: the M.2 SSD having
/and the HDD having/data - Preinstall the
microk8sanddockersnap packages - Reboot!
After the first boot, it's always good to update the OS and packages, and deploy a few of my favorites:
sudo apt update && sudo apt upgrade
sudo apt install jq net-tools vim

wget -O- https://carvel.dev/install.sh > install.sh
sudo bash install.sh
rm install.sh
Setting up Host Path
By default, Microk8s stores PersistentVolumes using the hostpath-storage add on at /var/snap/microk8s/common/default-storage. This would put it on the M.2 drive, but I want it to go on the HDD. I did a little trick:
sudo mkdir /data/cluster-storage
sudo chown kubernetes:kubernetes /data/cluster-storage/
cd /var/snap/microk8s/common
sudo rm default-storage
sudo ln -s /data/cluster-storage default-storageUPDATE: I don't do this anymore, because I stopped using the M.2 drive as my root partition.
Setting up High Availability
Using High Availability in Microk8s has some great advantages: The cluster stays online if a node fails, and I can issue kubectl commands to any node. I had two computers, so I needed to add a third node. I remembered that I ran Microk8s on my Raspberry Pi. If I added that back to the cluster, I could enable HA.
I did a fresh install of Ubuntu Jammy on the Pi using the Raspberry Pi Imager. Much like before, update the packages and sudo snap install microk8s.
Now that the Pi is part of the cluster, I reconfigured my router to send traffic meant for the cluster to that node as the primary ingress route. However, that didn't fix thing and started seeing nginx issues. Using Octant, I found there were issues with the Calico pod on the Pi. Calico is a container networking solution that Microk8s uses to direct traffic within the cluster. Turns out, there's a known issue with Calico on the Pi that's solved by installing a single package.
Conclusions
It's been running fairly stably for a few weeks now. One of the Lenovo nodes is having trouble with filesystems, and I'll troubleshoot that in another post.
I documented the full setup steps in my cluster GitHub repository. It's more for my benefit of knowing what I did to set things up, but maybe it'll benefit someone else.